5 Reproducibility: Tracking Changes with Git
Purpose: In this class you’ll turn in all your work using GitHub. To do this, you’ll need to be able to track and push changes in your repository.
Reading: Follow all the steps in Tracking Changes
Topics: Staging, committing, pushing
5.1 Configure RStudio to use git
This exercise introduces the graphical interface for git through RStudio. To
use this interface, you’ll need to click Tools -> Global Options -> Git/SVN.
If Git executable shows (none), click Browse and selec tthe git executable
installed on your system.
- On Mac / Linux you can use
which gitfrom your command line - On Windows
git.exeis probably somewhere inProgram Files
See these notes for more info.
5.3 Add a readme
Navigate to your repository (the one you made in e-rep02-create). If you don’t yet have a file called README.md, create it. You can do this through RStudio with File > New File > Markdown File.
5.4 Commit changes
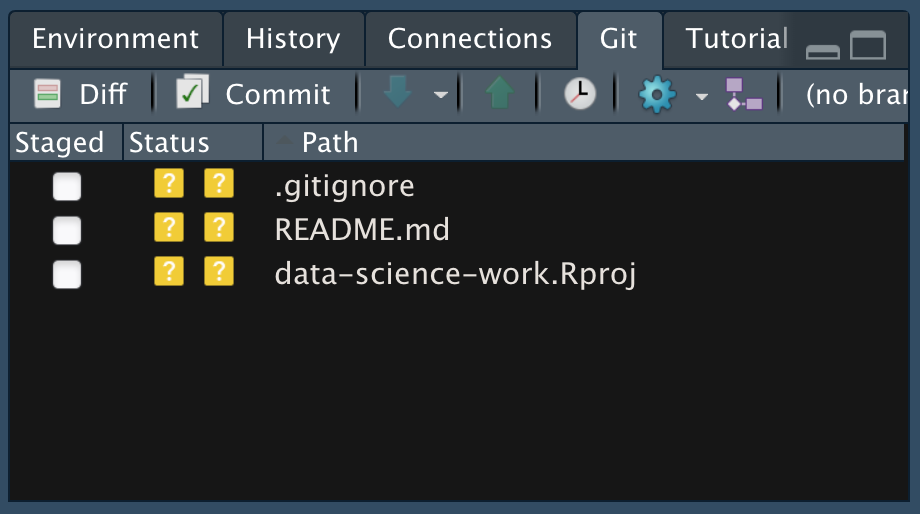
Once you’ve updated your readme, you can click on the Git tab in RStudio to check changes in your repository.
Note: The Git tab will only appear if you’ve opened a project in RStudio. You can do this by clicking the Project button in the top-right of RStudio and opening the data-science-curriculum.Rproj file in your repository. OR you can just use git through whatever interface you like best!
This is an alternative to using Git with the terminal. We’ll work through an entire workflow of commiting and pushing our work to your GitHub repository.
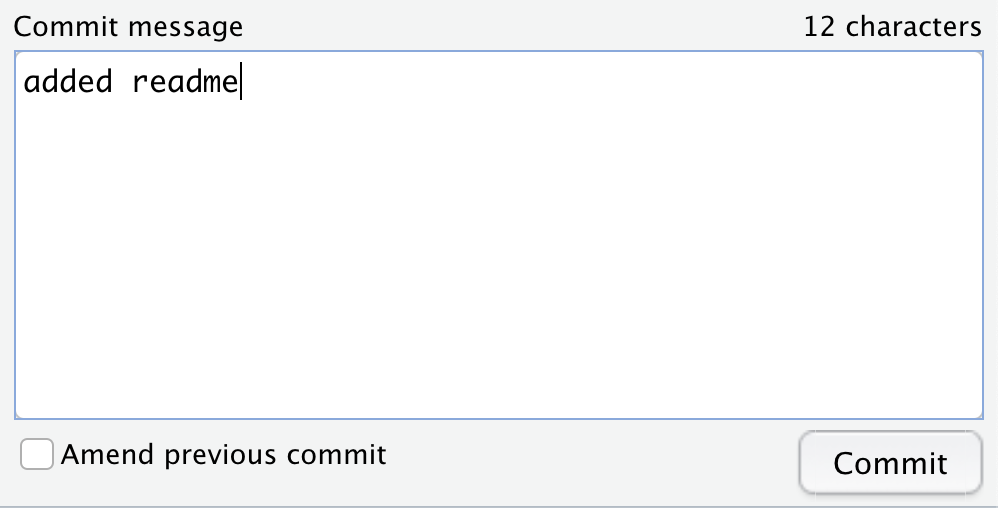
5.4.1 q2 From RStudio, click the Staged button for README.md. Then click Commit to open the commit dialogue; add a commit message then click Commit to finish.
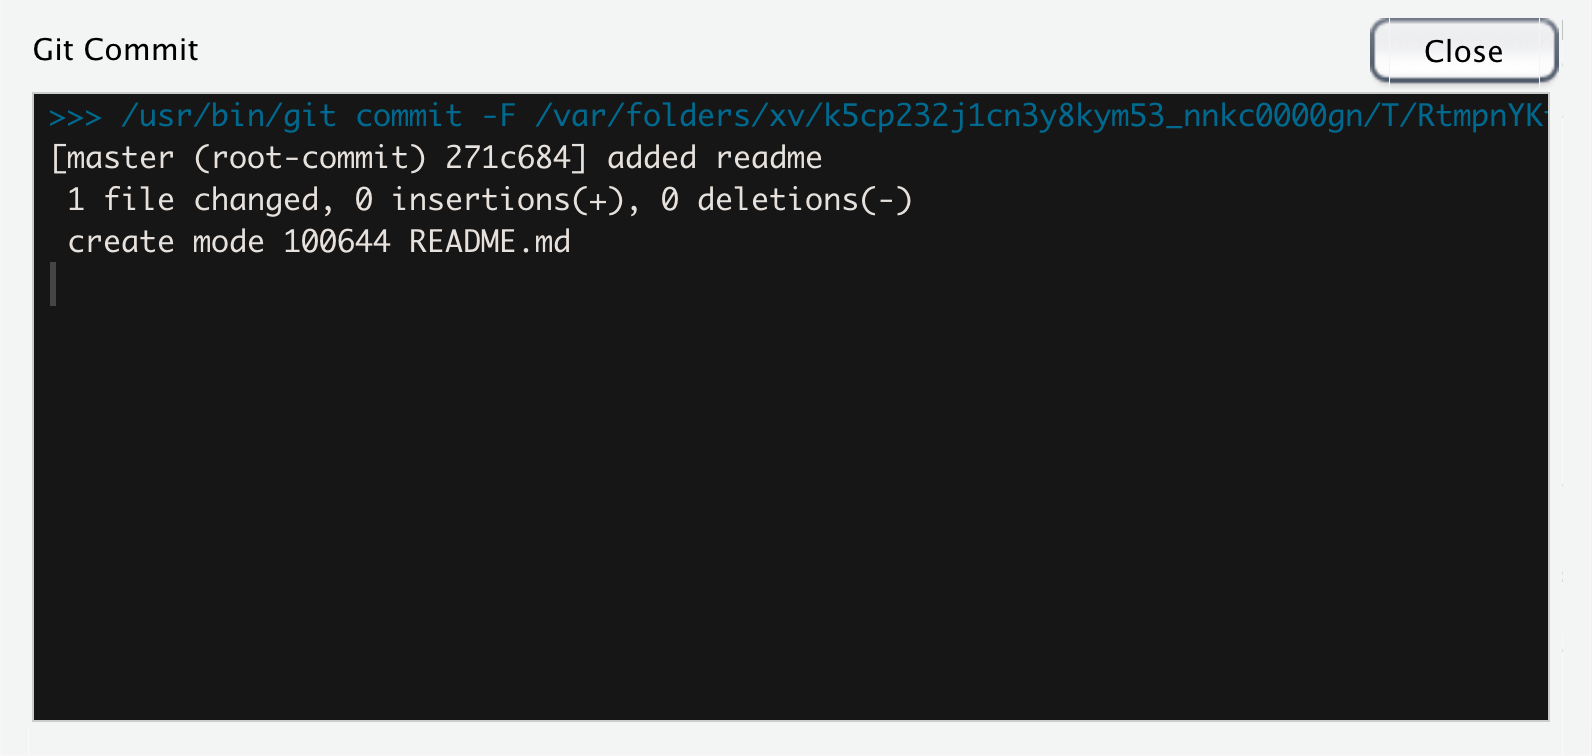
This will open a window confirming your commit; you can safely close this.
Once you’ve finished this, you’ve successfully tracked your changes locally. However, since your repository is linked to GitHub, you can also save your changes by pushing them to the remote server.
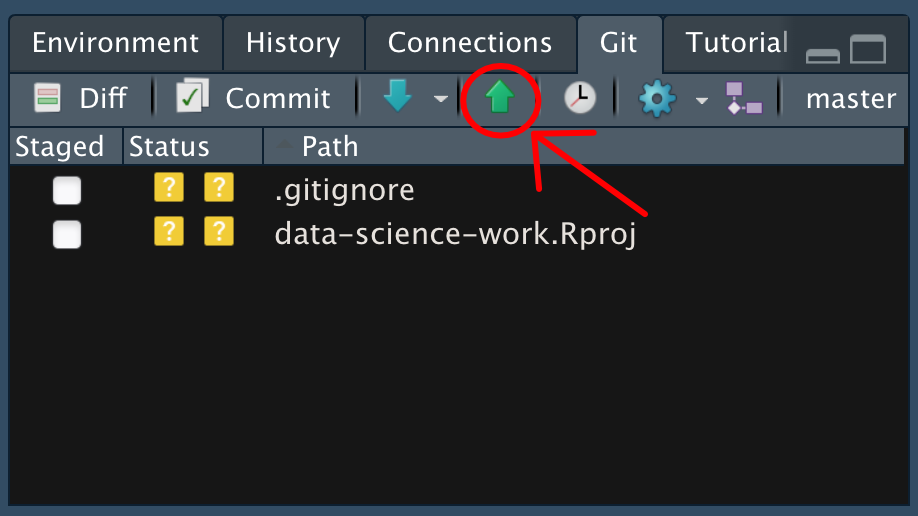
5.4.2 q3 Click the push button (green upward arrow, highlighted below) to push your changes to GitHub. Check your repository in GitHub (on the internet); you should be able to see your changes to the readme text.
 Now you have a backup copy of your work in GitHub, and you can easily share your work by sharing a link to your repository! This is how you will submit Challenges to Canvas: by sharing a link to your work.